Shopware 6 Integration
Integration Overview
- Install the Doc2cart plugin via Composer or ZIP file
- Generate and configure your API keys
- Configure plugin settings and access rules
- Customize the document import button appearance
- Add the Doc2cart CMS element to your pages (optional)
- Test the integration to ensure everything works correctly
Requirements
- An active Doc2cart account with available credits
- Shopware 6.5.0 or higher
- PHP 8.1 or higher (as required by Shopware 6.5+)
- Administrator access to your Shopware 6 store
- Access to your server's command line (for Composer installation)
Using an older Shopware version?
If you need to integrate Doc2cart with Shopware versions below 6.5.0, you can fork our repository and adapt it to your specific Shopware version.
Important: The Doc2cart import button appears by default on the cart page. You can also add it to any other page using the Doc2cart CMS element in the Shopping Experiences editor.
Installation Methods
The Doc2cart plugin can be installed using two methods. Choose the one that best fits your workflow:
- Composer Installation: Recommended for developers and stores using version control
- ZIP File Installation: Quick installation through the Shopware admin panel
Method A: Install via Composer (Recommended)
For stores using Composer for dependency management, this is the recommended installation method. The plugin is available on Packagist.
Step 1: Install the plugin using Composer:
composer require lcom/shopware-doc2cartStep 2: Install and activate the plugin:
bin/console plugin:refresh
bin/console plugin:install --activate LcomDoc2cart
Step 3: Clear the cache:
bin/console cache:clearStep 2: Method B: Install via ZIP File

Download the latest version of the Doc2cart plugin and install it through the Shopware admin panel.
Step 1: Download the plugin ZIP file for your desired version.
Step 2: Navigate to Extensions → My extensions → Upload extension in your Shopware admin panel.
Step 3: Upload the ZIP file and install the plugin.
Step 4: Activate the plugin from the Extensions overview.
Step 5: Clear your cache using Settings -> System -> Caches & Indexes to ensure the plugin is properly loaded.
Configuration Steps
Step 1: Generate API Keys
Before configuring the plugin, you need to generate API keys from your Doc2cart account.
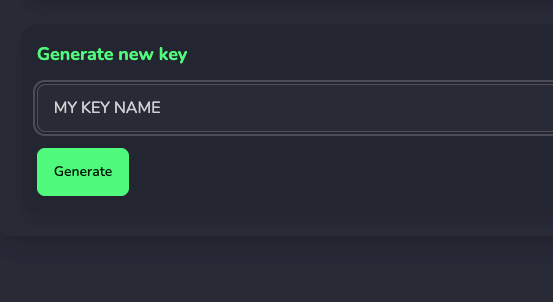
Log in to your Doc2cart account at doc2cart.com and navigate to the "API Keys" section.
Click on "Generate New Key" to create a new pair of keys. Make note of both the public and secret keys, as you'll need them in the next step.
Step 2: Configure Plugin Settings
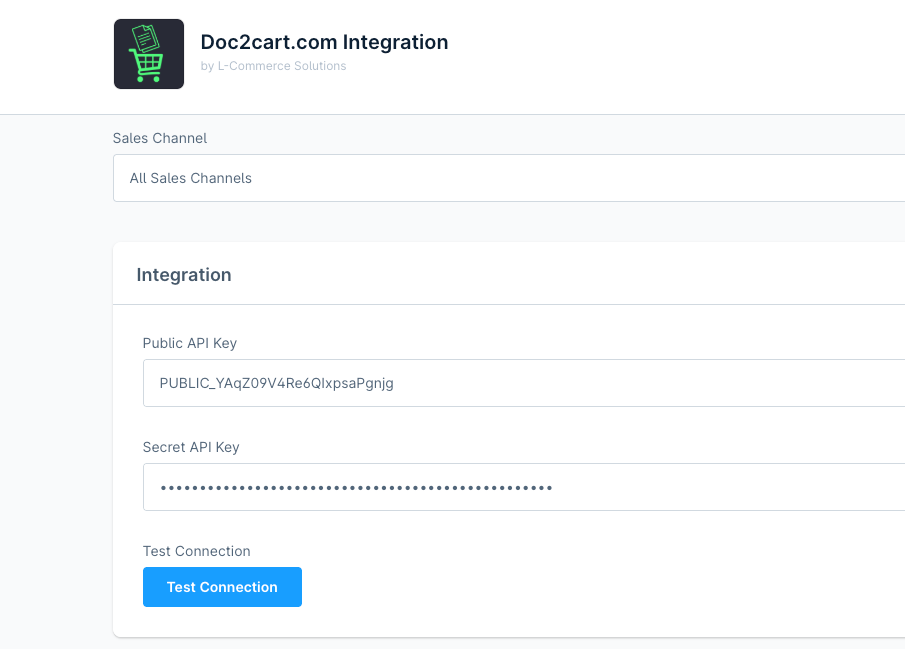
Navigate to Extensions → My extensions → Doc2cart in your Shopware admin panel and click "Configure".
Enter your Doc2cart API keys in the corresponding fields:
- Public API Key: Your public key from Doc2cart
- Secret API Key: Your secret key from Doc2cart
Click "Test Connection" to verify that the keys are correct and the connection is working properly.
Step 3: Configure Access and Behavior Settings
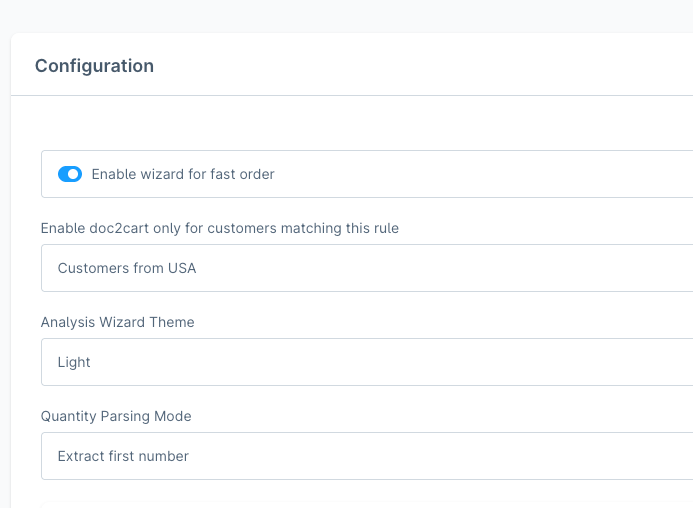
Customize how the Doc2cart feature behaves in your store:
- Enable wizard for fast order: Allow customers to use the document import wizard for quick ordering
- Enable doc2cart only for customers matching this rule: Restrict access to specific customer groups using Shopware's rule builder
These settings give you control over who can access the document import feature and when it's available.
Step 4: Customize Wizard Appearance
Personalize the document import wizard to match your store's design:
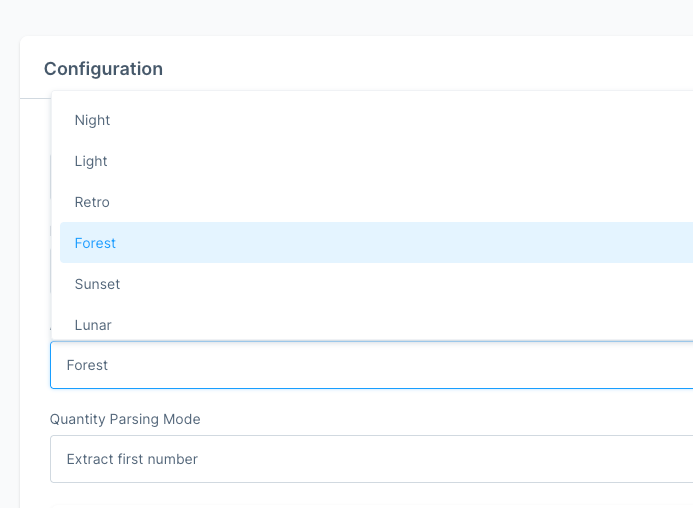
- Analysis Wizard Theme: Choose from multiple themes (night, light, retro, forest, sunset, lunar, sandstorm)
- Quantity Parsing Mode: Configure how quantity values are interpreted from documents
For detailed information about these options, refer to our Analysis Wizard Theme Guide and Quantity Parsing Documentation.
Step 5: Verify Cart Page Integration
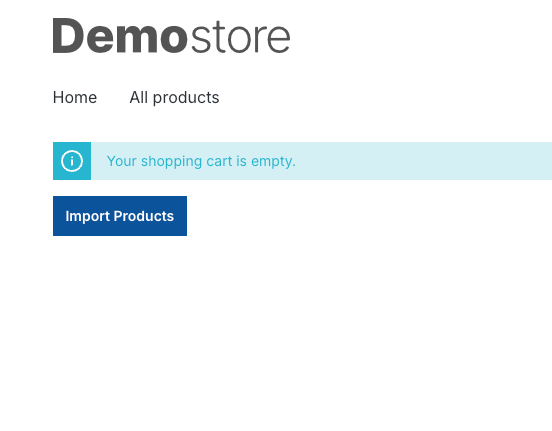
The Doc2cart import button is automatically added to your cart page once the plugin is installed and configured.
Visit your store's cart page to see the import button in action. The button will only appear when:
- The plugin is properly configured with valid API keys
- The current customer matches any configured access rules
- The "Enable wizard for fast order" setting is enabled
Step 6: Add CMS Element (Optional)
Beyond the automatic cart page integration, you can add the Doc2cart button to any page using the CMS element.
In the Shopping Experiences editor:
- Navigate to Content → Shopping Experiences
- Edit an existing layout or create a new one
- Add the "Doc2cart Import Button" element from the Commerce section
- Configure the button text and appearance as needed

Step 7: Test the Integration
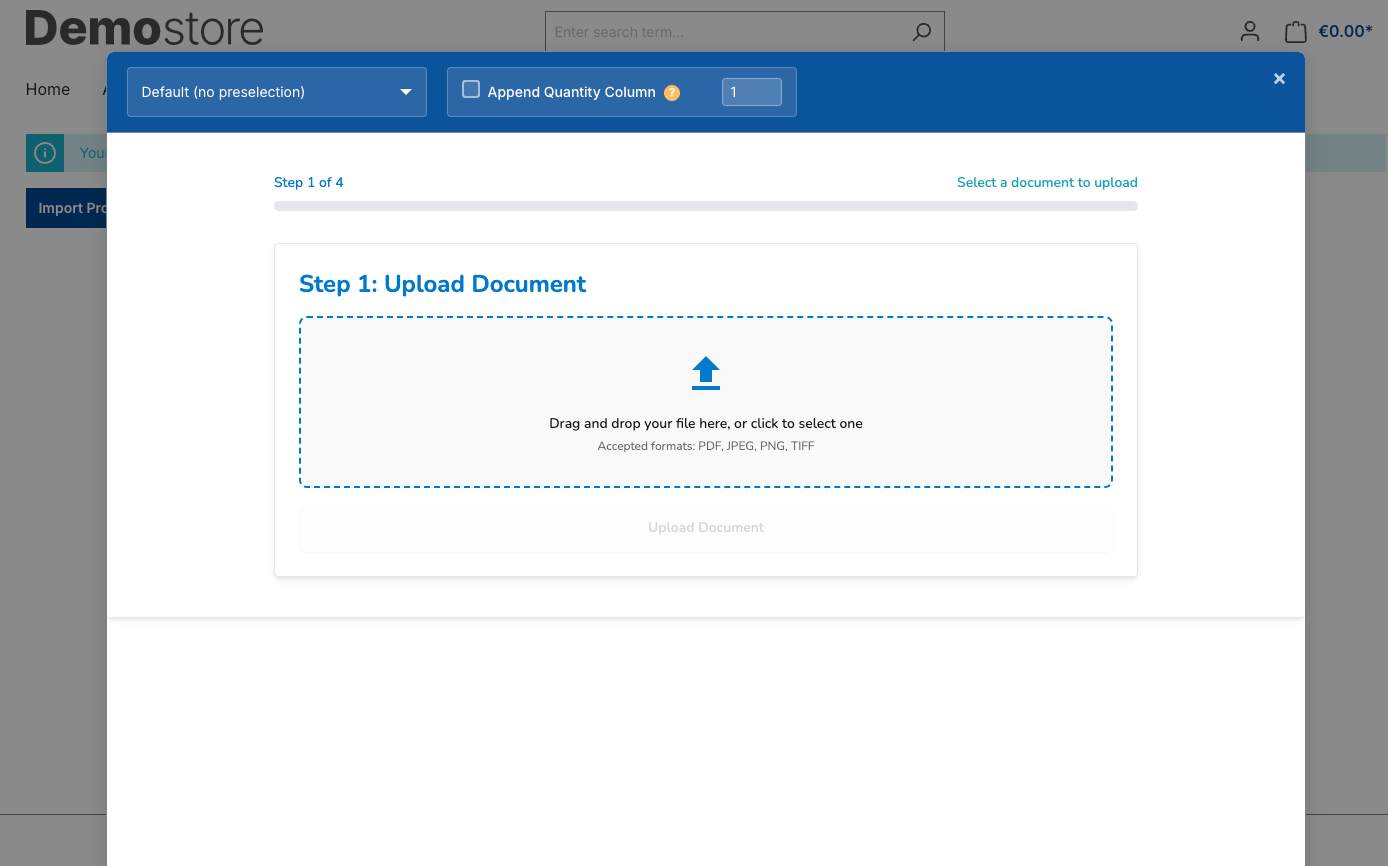
Test the complete integration to ensure everything works correctly:
- Visit your store's cart page or a page with the Doc2cart CMS element
- Click the Doc2cart import button to open the wizard
- Upload a test document (PDF or image with product information)
- Follow the wizard steps to select products and quantities
- Confirm the selection to add products to your cart
The system will display success messages and update the cart with the imported products.
Advanced Configuration
Plugin Settings Overview
| Setting | Description | Default |
|---|---|---|
| Public API Key | Your public API key from Doc2cart account | Empty |
| Secret API Key | Your secret API key from Doc2cart account | Empty |
| Enable wizard for fast order | Controls whether the document import feature is available | Disabled |
| Customer access rule | Restricts access to specific customer groups or conditions | All customers |
| Analysis Wizard Theme | Visual theme for the document import wizard | Night |
| Quantity Parsing Mode | How quantity values are interpreted from documents | NUMBER_ONLY |
Configuration Best Practices
- Always test the API connection after entering your keys
- Use customer rules to gradually roll out the feature to specific groups
- Choose a wizard theme that matches your store's design
- Clear the cache after making configuration changes
Related Documentation: For detailed information about wizard themes and quantity parsing modes, see the main API Documentation.